Well done steak time charts help home cooks and grill enthusiasts achieve the perfect level of doneness without overcooking. Cooking a steak to well done requires precision in temperature and timing to avoid a dry or tough texture. Choosing the right cut, seasoning properly, and monitoring internal temperature ensure a flavorful and juicy steak. Grilling, pan-searing, and oven-finishing all play a role in achieving consistent results. Understanding how different cooking methods affect doneness helps prevent common mistakes. This guide provides a detailed steak time chart and essential tips for cooking steak properly every time.
A well done steak time chart helps home cooks achieve the perfect level of doneness without overcooking.
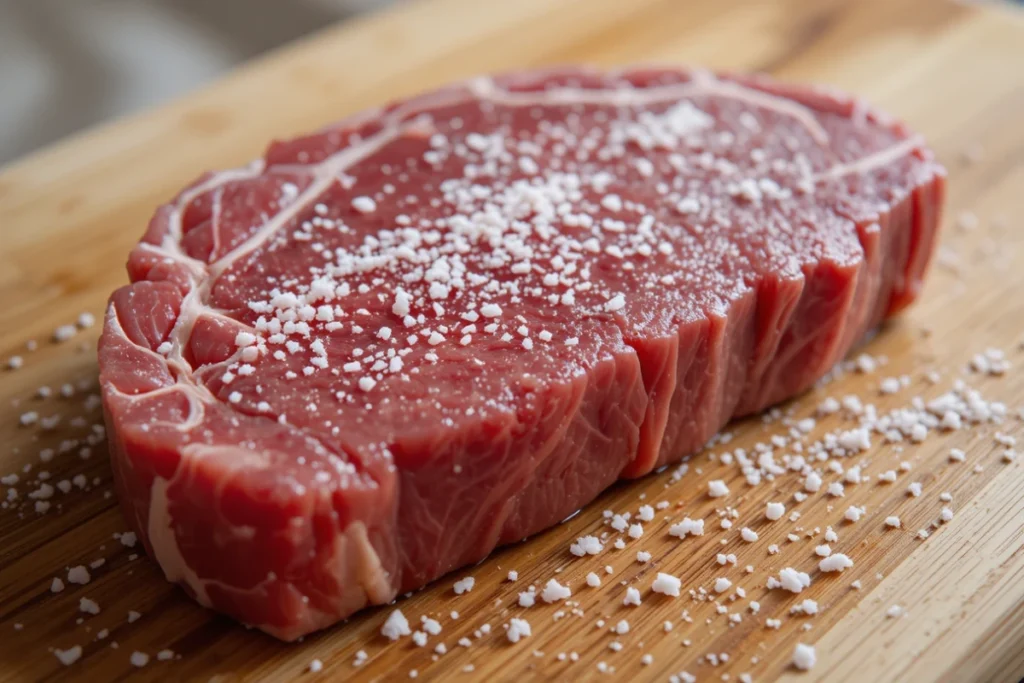
Salting Steak: The Key to a Flavorful Well-Done Steak
When to Salt?
Salting your steak is a crucial step that can significantly affect the final flavor and texture of the meat. The timing of when you salt your steak can vary depending on the method you choose.
Understanding a well done steak time chart ensures your steak reaches the right internal temperature while staying as tender as possible.
For optimal results, dry brining is often recommended. This involves salting the steak well in advance of cooking, ideally several hours or even a day before. By allowing salt to penetrate the meat over time, it enhances flavor and helps retain moisture during cooking. The process works because salt draws out moisture initially but then allows it to be reabsorbed along with some of the salt, resulting in a more flavorful and juicy steak.
Alternatively, if you’re short on time, salting just before cooking can also yield good results. In this case, sprinkle kosher or sea salt evenly over both sides of the steak right before placing it on heat. While this method does not allow for as much flavor penetration as dry brining does, it can still create a delicious crust when seared properly.
Salt Types & Best Practices
Choosing the right type of salt for seasoning your steak is essential for achieving maximum flavor without overwhelming the dish. Kosher salt is widely regarded as one of the best options due to its larger grain size which makes it easier to control how much you apply and promotes even distribution across the surface.
Table salt is another option; however, its finer grains mean that it’s easier to accidentally use too much if you’re not careful. This could lead to an overly salty taste that masks other flavors in your dish.
Sea salts are also popular among chefs for their unique textures and flavors; they come from evaporated seawater and may contain trace minerals that add subtle nuances to your food.
Regardless of which type you choose, it’s important to apply an appropriate amount, so that there’s visible coverage but not so much that it overwhelms other flavors. A general rule is about one teaspoon per pound of meat when using kosher salt.
How Salting Affects Texture & Juiciness
The act of salting has profound scientific implications on both texture and juiciness in steaks due primarily to its interaction with proteins within meat fibers. When salted properly ahead of time through dry brining techniques, sodium ions begin breaking down protein structures within muscle fibers through a process called denaturation.
This breakdown allows proteins like myosin, responsible for muscle contraction to unwind and absorb water more effectively during cooking instead of losing moisture through evaporation or dripping away during grilling or pan-searing processes.
As a result, steaks seasoned well with adequate time will have enhanced juiciness since they retain more internal moisture while being cooked at higher temperatures required for achieving well-done perfection without becoming excessively dry or toughened by overcooking.
In summary, understanding when and how best practices around salting work will elevate any attempt at preparing a well-done steak into something truly memorable, offering layers upon layers rich with savory notes while maintaining tenderness throughout each bite.
Grilling Ribeye on a Gas Grill for a Perfect Well-Done Steak
Ideal Ribeye Thickness & Prep
When grilling a ribeye steak, the thickness of the cut plays a crucial role in achieving that perfect well-done result. Here are some key considerations for selecting and preparing your ribeye:
- Thickness Matters: Aim for ribeye steaks that are at least 1 to 1.5 inches thick. Thicker cuts provide more room for cooking without becoming overly dry, allowing you to achieve the desired doneness while retaining moisture.
- Trimming Excess Fat: While ribeyes naturally have marbling that contributes to flavor, trim any excessive fat around the edges before grilling. This helps reduce flare-ups on the grill and prevents charring that can occur with too much fat.
- Room Temperature Preparation: Let your ribeye sit at room temperature for about 30 minutes before grilling. This allows for even cooking throughout the steak and reduces cooking time on the grill.
- Season Generously: After prepping your steak, season it generously with kosher salt and freshly ground black pepper or your favorite seasoning blend to enhance its natural flavors.
By following these preparation steps, you set yourself up for success in achieving a perfectly cooked well-done ribeye.
Before using the well done steak time chart, season your steak properly with salt to enhance flavor and lock in moisture.
Best Grill Temperature & Cooking Time
Grilling requires precise temperature control to ensure even cooking while avoiding dryness or overcooking of your steak. Below is a table detailing recommended grill temperatures and corresponding cooking times based on thickness:
| Ribeye Thickness | Grill Temperature (°F) | Cooking Time (Minutes per Side) |
|---|---|---|
| 1 inch | 450 – 500 | 6 – 8 |
| 1.5 inches | 450 – 500 | 8 -10 |
| Over 2 inches | Medium Heat (350-400) | Sear first then indirect heat; total time approximately 15-20 minutes |
Use this chart as a guideline but remember that individual grills may vary in heat distribution, so adjust accordingly based on how your particular setup performs.
When cooking a ribeye, refer to the well done steak time chart to determine the exact grilling duration based on the thickness of your cut.
Avoiding Overcooking & Dryness
To achieve a juicy well-done ribeye without sacrificing tenderness or flavor, follow these essential tips:
- Use a Meat Thermometer: Invest in an accurate meat thermometer to monitor internal temperatures accurately throughout the grilling process.
- Target Internal Temperature: For well-done steaks, aim for an internal temperature of around 160°F (71°C). Remove from heat slightly earlier since residual heat will continue cooking it as it rests.
- Implement Two-Zone Grilling Technique: Start by searing one side of the steak over direct high heat until browned—this creates flavorful crust—then move it to indirect heat until reaching desired doneness.
- Rest Your Steak After Grilling: Allowing your grilled ribeye to rest covered loosely with foil for about five minutes lets juices redistribute within its fibers instead of spilling out when cut into immediately after grilling.
By implementing these strategies during preparation and grilling processes, you can enjoy an exceptionally flavorful and juicy well-done ribeye every time!
Thin cuts cook faster, so following a well done steak time chart prevents overcooking while ensuring food safety.
Grilling Thin Steaks Without Overcooking
Best Thin Cuts for Grilling
When it comes to grilling thin cuts of steak, certain options stand out for their flavor and tenderness. Flank steak is a popular choice; its long, flat shape allows for quick cooking while delivering a robust beefy flavor. Skirt steak is another excellent option, known for its intense marbling that enhances juiciness and taste. Sirloin tips also work well as they provide a balance between tenderness and affordability, making them suitable for various marinades and seasonings.
Selecting the right cut is essential because thin steaks cook rapidly on the grill. This means you must pay close attention to prevent overcooking while ensuring you achieve that perfect level of doneness.
Fast & Hot Method
Grilling thin steaks requires a fast and hot approach to ensure they remain juicy while achieving a desirable crust. Preheat your grill to high heat, ideally around 450°F or higher, before placing your meat on the grates. The goal here is to sear the outside quickly without allowing too much time for heat penetration into the center.
For best results, place your seasoned steak directly over the hottest part of the grill. Cook each side for about two to four minutes depending on thickness; this rapid cooking method locks in moisture and enhances flavors through caramelization on the surface. Keep an eye on them since thinner cuts can go from perfectly cooked to overdone in just moments.
Using a Meat Thermometer
To ensure that your thin steaks reach optimal doneness without sacrificing juiciness or tenderness, using a meat thermometer becomes invaluable. Insert it into the thickest part of the cut before removing it from heat; this will give you an accurate reading of internal temperature.
For well-done results with thin cuts like flank or skirt steak, aim for an internal temperature around 160°F (71°C). Since these cuts are thinner than traditional ribeyes or sirloins, they can reach this temperature relatively quickly compared to thicker pieces of meat. Monitoring temperatures helps avoid guesswork during grilling and ensures every bite remains flavorful rather than dry or tough due to overcooking.
By understanding which cuts work best when grilling thin steaks alongside effective cooking methods such as fast searing at high temperatures, and employing tools like thermometers, you can masterfully prepare deliciously tender well-done steaks every time.
Grilling New York Strip to Well-Done Perfection
Marinades & Tenderizing Techniques
Marinades and tenderizing techniques are essential for enhancing the flavor and texture of your New York strip steak, especially when aiming for well-done perfection. Here are some effective methods to consider:
- Acidic Components: Incorporate ingredients like vinegar, citrus juice, or wine into your marinade. These acids help break down tough muscle fibers, making the steak more tender while infusing it with flavor.
- Oil: Use a good quality oil such as olive oil or avocado oil in your marinade to add richness and moisture to the meat.
- Herbs and Spices: Add fresh herbs like rosemary, thyme, or parsley along with spices such as garlic powder or paprika to enhance the overall taste profile of your steak.
- Marinating Time: Allow the steak to marinate for at least 30 minutes but ideally up to several hours (or overnight) in the refrigerator for maximum flavor absorption.
- Mechanical Tenderization: Consider using a meat mallet or a fork to gently pound the surface of the steak before marinating it. This technique breaks down connective tissues without compromising its structure too much.
By employing these marinades and tenderizing techniques, you can elevate both flavor and tenderness in your New York strip steaks.
A well done steak time chart provides grilling guidelines that help avoid excessive dryness while cooking a New York strip steak.
Two-Zone Grilling Method
The two-zone grilling method is an effective technique that allows you to achieve perfect sear marks while ensuring even cooking throughout your New York strip steak without overcooking it on direct heat alone. Here’s how this method works:
- Setting Up Your Grill: Preheat one side of your grill on high heat (direct heat) while leaving another side off (indirect heat). This creates two distinct temperature zones that facilitate better control during cooking.
- Searing Phase: Start by placing your seasoned New York strip directly over high heat for about 3-4 minutes per side until you achieve those beautiful grill marks and a flavorful crust forms on each side.
- Finishing Phase: After searing both sides, move the steak over to the cooler side of the grill (indirect heat). Close the lid and allow it to cook through gradually until it reaches an internal temperature of around 160°F (71°C).
This method not only helps retain moisture but also prevents flare-ups from fat drippings that can lead to burnt edges while allowing thorough cooking throughout each bite of deliciously well-done beef goodness!
Resting for Best Results
Resting is a crucial step after grilling any cut of meat, including New York strips cooked well-done; this process ensures optimal juiciness and texture upon serving:
- Why Rest? When you remove meat from direct heat sources like grills or pans, juices within redistribute throughout its fibers instead of pooling at one end when sliced immediately after cooking, resulting in drier bites if cut too soon.
- Resting Timeframe: Allow steaks rest covered loosely with foil for about five minutes post-cooking; this timeframe balances out temperatures internally without cooling them down excessively.
- Serving Suggestions: After resting adequately, slice against grain before serving; doing so enhances tenderness further as opposed to cutting along natural muscle lines, which could yield chewier pieces instead!
Incorporating these steps into preparing grilled New York strip steaks will result in flavorful meals every time!
Cooking a Well-Done Steak in a Cast Iron Skillet

Why Cast Iron is Great for Steak
Cast iron skillets are a favorite among chefs and home cooks alike for cooking steak, and there are several reasons why this cookware excels in delivering perfectly seared meat.
First, cast iron retains heat exceptionally well. Once preheated, it maintains a consistent temperature, allowing for even cooking and creating a beautiful crust on the steak. This heat retention is crucial when searing because it ensures that the exterior of the meat caramelizes effectively while locking in juices.
Second, cast iron skillets can withstand high temperatures without warping or damaging. This makes them ideal for achieving that perfect sear needed to create flavorful Maillard reactions on the surface of your steak.
Additionally, cast iron provides versatility; you can start cooking on the stovetop and then easily transfer it to an oven if you need to finish cooking your steak at a lower temperature. The combination of direct heat from the burner and radiant heat from the skillet itself results in deliciously cooked steaks every time.
Using a cast iron skillet allows better heat control, especially when following a well done steak time chart for precise cooking times.
Step-by-Step Cooking Guide
Cooking a well-done steak in a cast iron skillet involves several key steps:
- Preheat Your Skillet: Place your empty cast iron skillet over medium-high heat for about 5 minutes until hot but not smoking.
- Prepare Your Steak: Season your room-temperature steak generously with kosher salt and freshly ground black pepper or your preferred seasoning blend.
- Add Oil: Pour in a high smoke point oil like vegetable oil or grapeseed oil just before adding the steak; this helps prevent sticking while providing additional flavor.
- Sear One Side: Place the seasoned side of your steak down into the hot skillet, avoid overcrowding, and let it sear without moving it for about 4-5 minutes until browned.
- Flip and Sear Again: Carefully flip over using tongs; allow this side to cook another 4-5 minutes as well.
- Check Internal Temperature: Use an instant-read thermometer inserted into the thickest part of meat aiming for around 160°F (71°C) if you want well-done perfection.
- Finish Cooking If Needed: If necessary, transfer skillet with steaks into preheated oven at 350°F (175°C) until desired doneness is reached.
- Rest Before Serving: Remove from pan once finished cooking; let rest covered loosely with foil for about five minutes before slicing.
By following these steps diligently, using your trusty cast iron skillet will yield satisfying results each time!
Butter Basting for Extra Flavor
Butter basting is an excellent technique that adds richness and depth to flavor when preparing steaks in a cast iron skillet:
- Choose Quality Butter: Use unsalted butter so you can control sodium levels better during seasoning processes while allowing natural flavors shine through more prominently.
- Add Aromatics: Consider adding garlic cloves or fresh herbs like thyme or rosemary alongside butter during the basting process, these ingredients infuse their wonderful aromas directly into melted fat, enhancing overall taste profile significantly!
- Baste While Cooking: After flipping your steak during its final few minutes on high heat (or once internal temperature approaches desired level), add several tablespoons of butter along with aromatics directly into pan around sides where they’ll melt quickly against hot surface area creating fragrant sauce base ready to absorb onto juicy cuts below!
4 . Use Spoon Technique: Tilt pan slightly so melted fats pool on one side, then use spoon repeatedly, drizzle liquid back atop exposed areas, ensuring complete coverage providing maximum flavor infusion throughout entire piece as well as additional moisture retention, resulting in tender bites overall!
Incorporating butter basting not only elevates flavors but also enhances juiciness, making every bite memorable!
Recap Key Takeaways from Each Section
Cooking a well-done steak requires precision, patience, and the right techniques. Salting plays a crucial role in enhancing flavor and retaining moisture, whether through dry brining or seasoning just before cooking. Grilling a ribeye on a gas grill demands controlled heat and a two-zone cooking method to prevent dryness while achieving an even sear. For thin steaks, high heat and quick cooking prevent overcooking and preserve tenderness. New York strip steaks, with their balance of fat and texture, benefit from marinating and indirect heat grilling to maintain juiciness. Cast iron skillets provide excellent heat retention, allowing for a beautifully seared crust and even cooking when finished in the oven. Each method requires careful timing and temperature control to avoid common pitfalls.
Whether grilling or pan-searing, a well done steak time chart serves as a reliable reference for cooking steak to perfection.
The Importance of Meat Thermometers and Resting Time
Cooking steak to well done without compromising texture relies on precision. A meat thermometer ensures accuracy by measuring internal temperature instead of guessing doneness based on color or cooking time alone. For a well-done steak, an internal temperature of 160°F guarantees safety without unnecessary overcooking. Resting the steak after cooking is equally important. Allowing the meat to rest for five to ten minutes enables juices to redistribute, preventing them from escaping when sliced. This simple step preserves moisture and enhances the steak’s overall tenderness and flavor. Skipping this process often results in a drier texture, even if the steak was cooked correctly.
Mastering a well-done steak takes practice, experimentation, and the willingness to refine techniques. Every cook has unique preferences, from seasoning choices to preferred cooking methods. Trying different approaches, such as experimenting with various marinades or adjusting grill temperatures, helps develop confidence in achieving consistently delicious results. Using a well-done steak time chart as a reference ensures precision, but personal experience ultimately refines the process. Readers are encouraged to apply these methods and share their results, whether through feedback, photos, or personal tips. Engaging in a community of steak lovers fosters learning and improvement, making the journey to the perfect well-done steak even more rewarding.
Chef’s Notes
- Choose the Right Cut: Thick-cut steaks, such as ribeye or New York strip, retain more moisture when cooked to well done. Avoid lean cuts like filet mignon, which can dry out quickly.
- Salt Early for Maximum Flavor: Dry brining by salting the steak at least 40 minutes before cooking enhances seasoning and improves texture. If short on time, salt just before cooking to avoid drawing out moisture.
- Use a Two-Zone Cooking Method: Whether grilling or using a cast iron skillet, start with high heat for a deep sear, then finish cooking at a lower temperature to prevent the steak from becoming tough.
- Monitor Internal Temperature Closely: A meat thermometer is essential for cooking accuracy. A well-done steak reaches 160°F internally. Overcooking beyond this point can result in excessive dryness.
- Let the Steak Rest Before Slicing: Resting for at least 5 to 10 minutes allows juices to redistribute, preventing them from spilling out when cut. This keeps the steak flavorful and tender.
- Add Extra Moisture if Needed: Basting with butter, using marinades, or incorporating pan sauces can help counteract potential dryness in a well-done steak.
- Experiment with Cooking Methods: If grilling isn’t an option, consider reverse-searing or oven-finishing for a more controlled cooking process that locks in flavor and tenderness.
Perfecting a well-done steak takes patience and technique, but with the right approach, it can be just as juicy and flavorful as any other doneness level.
Leave a Reply