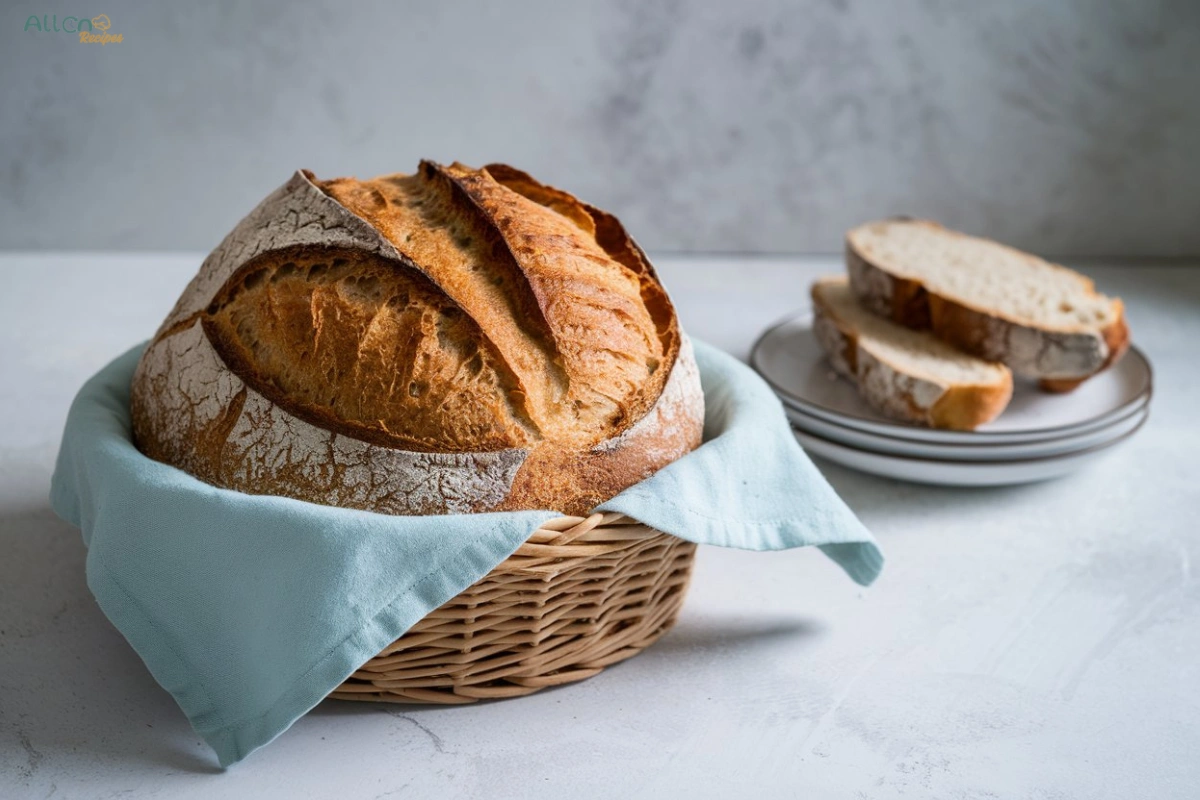
Artisan Italian bread has captured the hearts (and taste buds) of bread lovers worldwide. Its rustic appearance, golden crust, and soft, airy interior evoke a sense of tradition and craftsmanship that feels both timeless and comforting. Whether it’s a classic ciabatta, a hearty focaccia, or a crusty pane Toscano, artisan Italian bread offers a unique blend of flavors and textures that elevate any meal.
Baking your own bread at home not only lets you enjoy the unmatched freshness of a homemade loaf but also gives you full control over the ingredients. It’s a creative and rewarding process that connects you to the rich heritage of Italian breadmaking. Best of all, it’s easier than you might think!
In this guide, we’ll share 10 practical hacks to help you master the art of artisan Italian bread at home. From understanding the essential ingredients to achieving the perfect crust, these tips will empower both beginners and seasoned bakers to create bakery-worthy loaves in their own kitchens. Let’s get started!
Understanding the Basics of Artisan Italian Bread
What Makes Italian Bread “Artisan”?
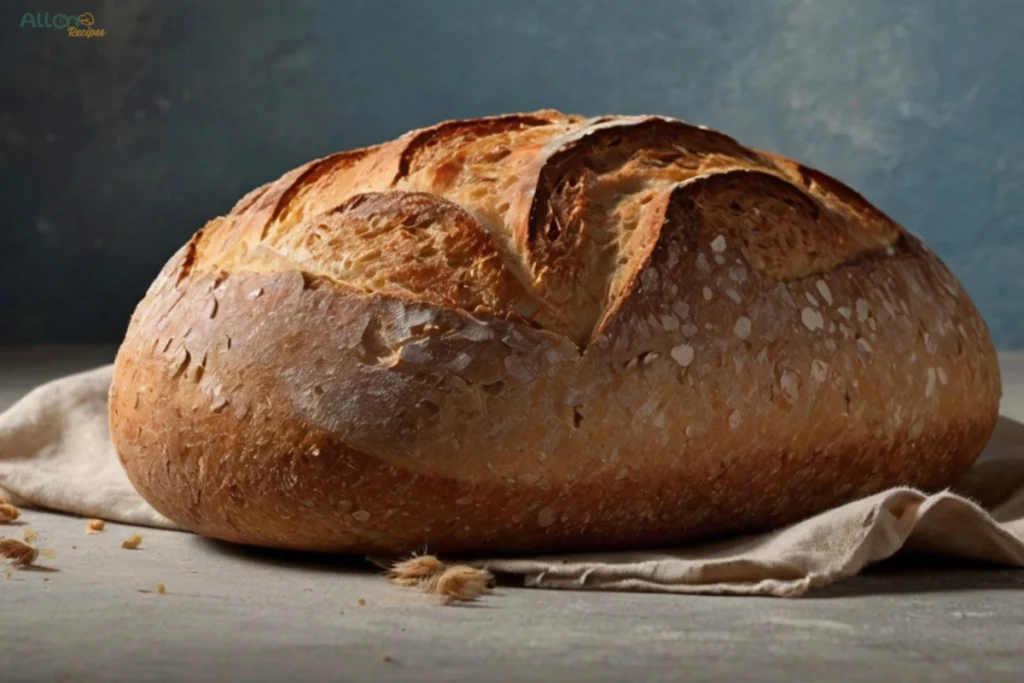
Italian bread earns the “artisan” label through its handcrafted quality, simplicity, and focus on traditional methods. Unlike mass-produced bread, artisan Italian bread is typically made in small batches with high attention to detail. The hallmark of true artisan bread is its rustic crust, soft interior, and irregular air pockets that give it a unique texture.
Another key characteristic is the absence of preservatives or artificial additives. Artisan bread relies solely on natural ingredients, which means the flavors are purer and richer. Additionally, the use of long fermentation times enhances both the flavor and the digestibility of the bread. This slow fermentation process allows natural sugars to develop, resulting in a bread that’s slightly sweet with a deeper, more complex taste.
Traditional techniques like hand-kneading and shaping add to the artistry of Italian bread. When combined with time-tested methods, these elements make artisan Italian bread not just food but a culinary experience that connects bakers to a rich cultural heritage.
Essential Ingredients for Authentic Flavor
To make authentic artisan Italian bread, the ingredients need to be simple yet of the highest quality. Flour is the foundation, and using the right type makes all the difference. Italian 00 flour is often the top choice for its finely milled texture, but bread flour with high protein content also works well for a sturdy yet airy crumb.
Water plays a surprisingly significant role, too. Filtered or spring water is ideal, as it avoids impurities that could affect the bread’s rise and flavor. Yeast, whether active dry or fresh, provides the leavening, while salt adds flavor and strengthens the gluten structure during mixing.
Olive oil is another essential ingredient in many Italian bread recipes. It not only adds richness but also enhances the bread’s flavor profile, giving it that signature Mediterranean touch. The key is to stick to high-quality, extra-virgin olive oil for the best results. These simple yet carefully chosen ingredients are what create the foundation for delicious artisan Italian bread.
Key Tools Every Home Baker Needs
Baking artisan Italian bread at home doesn’t require a professional bakery setup, but having a few essential tools can make a big difference in your results. First and foremost, a Dutch oven or a cast-iron pot with a lid is invaluable for baking. These create a steamy environment that mimics a professional bread oven, resulting in a golden, crispy crust.
A baking stone or pizza stone is another tool that helps regulate heat, ensuring even baking and a well-browned base. Pair this with a peel (a flat paddle) to transfer your dough easily onto the stone. For proofing, a banneton basket is ideal for shaping and supporting your dough while it rises.
Don’t forget the smaller but equally important tools like a bench scraper for handling sticky dough and a lame (a special blade) for scoring the top of your loaf. Scoring allows the bread to expand properly during baking and gives it that artisan look. Finally, a kitchen thermometer is useful to check both the internal temperature of the bread (to ensure it’s fully baked) and the water temperature (to activate yeast correctly). With these tools, baking artisan bread becomes much more manageable, even for beginners.
Preparing the Perfect Dough
Choosing the Right Flour for Artisan Bread
Flour is the backbone of any bread, and selecting the right type is critical to achieving the perfect texture and flavor in artisan Italian bread. Not all flours are created equal, and understanding their properties can help you choose the best option for your loaf.
1. Bread Flour
Bread flour is a popular choice among bakers because of its high protein content, typically around 11-13%. This protein forms gluten when mixed with water, which gives artisan bread its characteristic chewy texture and strong structure. It’s ideal for creating loaves with a sturdy crust and airy crumb qualities that define artisan Italian bread.
2. Italian “00” Flour
Italian “00” flour is a favorite for more delicate bread, thanks to its super-fine texture. This flour is commonly used in traditional Italian baking, such as for focaccia or ciabatta. While it has a slightly lower protein content than bread flour, it produces a softer, more tender crumb. This makes it an excellent choice for pieces of bread where lightness and finesse are desired.
3. All-Purpose Flour
For beginners or those who don’t have access to specialty flours, all-purpose flour is a versatile alternative. While its protein content is lower than bread flour, typically around 9-11%, it can still produce good results, especially when combined with proper kneading and proofing techniques. It’s a great middle-ground for experimenting with artisan bread recipes.
4. Whole Wheat Flour
If you’re looking to add a nutty, earthy flavor to your artisan bread, whole wheat flour is a fantastic option. However, since it’s heavier and absorbs more water, it’s best to mix it with bread flour or all-purpose flour to maintain a balanced texture. Whole wheat flour also adds nutritional value, making your loaf healthier without sacrificing flavor.
5. Specialty Flours
For more adventurous bakers, consider experimenting with specialty flours like rye, spelled, or semolina. These flours bring unique flavors and textures to artisan Italian bread. For example, semolina flour is often used in Sicilian bread to create a slightly yellow hue and a distinctively rich taste.
Ultimately, the right flour depends on the type of bread you want to bake and your personal preferences. Experimenting with different flours or even blending them can help you discover your favorite combination for crafting the perfect artisan Italian bread.
Hydration Matters: Achieving the Perfect Dough Consistency
Hydration is one of the most critical factors in artisan Italian bread baking. It refers to the ratio of water to flour in the dough, expressed as a percentage. For example, a dough with 70% hydration means 70 grams of water for every 100 grams of flour. Getting the hydration level right directly affects the texture, crumb structure, and overall quality of your bread.
1. Why Hydration is Important
Hydration influences gluten development, which is essential for the dough’s elasticity and strength. Higher hydration levels help create an open crumb with beautiful air pockets, which is a hallmark of artisan Italian bread. Additionally, a well-hydrated dough retains moisture during baking, resulting in a softer crumb and a crispier crust.
2. Finding the Right Hydration Level
For artisan Italian bread, the ideal hydration level typically ranges between 60% and 80%, depending on the type of flour and the desired texture. Lower hydration (60-65%) is easier to handle and works well for beginners, producing a tighter crumb. Higher hydration (70-80%) is more challenging to work with but yields a lighter, more open crumb, perfect for ciabatta or focaccia.
3. Adjusting Hydration for Different Flours
Different types of flour absorb water differently, so your hydration level may need to be adjusted based on the flour you’re using. Whole wheat and rye flours, for instance, absorb more water than all-purpose or bread flour due to their higher fiber content. Similarly, finely milled flours like Italian 00 require slightly less water for a smooth dough consistency.
4. Tips for Handling High-Hydration Doughs
High-hydration doughs can feel sticky and challenging to manage, but with the right techniques, you can work with them like a pro:
- Use the Stretch-and-Fold Method: Instead of kneading, this technique strengthens gluten without overworking the dough.
- Flour Your Hands and Work Surface Lightly: This prevents sticking without overloading the dough with excess flour.
- Practice Patience: High-hydration doughs need longer fermentation times, which allow the gluten to fully develop and the dough to become more manageable.
5. Recognizing the Perfect Dough Consistency
The dough should feel tacky but not overly sticky, and it should stretch easily without tearing. If the dough feels too dry, it may need more water. On the other hand, if it’s too wet and unmanageable, folding techniques or a slightly longer proofing time can help.
Understanding hydration levels and mastering dough consistency may take a bit of trial and error, but it’s worth the effort. Once you find the right balance, you’ll achieve artisan Italian bread with the ideal crumb structure, texture, and flavor.
No-Knead vs. Kneaded Dough Techniques
When it comes to making artisan Italian bread, there are two primary methods for developing gluten in your dough: the traditional kneading technique and the increasingly popular no-knead approach. Both methods have their advantages and can yield delicious bread, so understanding their differences can help you choose the one that best suits your time, skill level, and desired outcome.
1. Traditional Kneaded Dough
The kneading technique is the classic method for developing gluten in bread dough. By physically working the dough, you align and strengthen the gluten strands, creating a structure that traps gas produced by the yeast. This structure is what gives bread its chewy texture and allows it to rise properly.
- Advantages of Kneading:
- Provides full control over the dough’s texture and elasticity.
- Results in a consistent crumb and structure.
- Shorter fermentation times compared to no-knead methods.
- Best for: Beginners looking to practice dough handling, or bakers who want to speed up the bread-making process.
- Technique Tips:
- Knead the dough on a lightly floured surface for 8–10 minutes until it becomes smooth and elastic.
- Use the “windowpane test” to check if the gluten is properly developed: stretch a small piece of dough into a thin membrane. If it doesn’t tear easily, it’s ready.
2. No-Knead Dough
The no-knead method relies on time rather than effort to develop gluten. The dough is mixed briefly and then left to rest for an extended fermentation period (often 12–18 hours). During this time, the gluten forms naturally as the yeast ferments, requiring minimal hands-on work.
- Advantages of No-Knead:
- Minimal effort and equipment required—perfect for busy or beginner bakers.
- Longer fermentation enhances the bread’s flavor, producing a tangier and more complex taste.
- Results in a rustic, open crumb and airy texture, ideal for artisan-style bread.
- Best for: Bakers who want a hands-off approach or are aiming for a more open crumb structure and deeper flavor.
- Technique Tips:
- Use a high-hydration dough (70% or more) for the best results.
- Mix the ingredients briefly until just combined, then cover and let ferment at room temperature.
- After fermentation, handle the dough gently to retain the air pockets before shaping and baking.
3. Which Method Should You Choose For Artisan Italian Bread?
The decision between no-knead and kneaded dough comes down to your personal preferences:
- Choose Kneaded Dough if you enjoy the hands-on process of bread-making, have limited time, or are looking for a more consistent crumb.
- Choose No-Knead Dough if you want a low-effort method with exceptional flavor and a rustic appearance.
Both techniques can produce excellent artisan Italian bread, so don’t hesitate to experiment with each method to discover which one works best for your schedule and style. Whether you prefer the therapeutic act of kneading or the convenience of letting time do the work, the result will be a delicious loaf that’s uniquely yours.
Mastering the Proofing Process
Why Proofing is Critical for Artisan Italian Bread
Proofing, also known as fermentation, is one of the most essential steps in making artisan Italian bread. It’s during this stage that the dough develops flavor, texture, and structure. Proofing allows the yeast to ferment the sugars in the dough, producing carbon dioxide gas. This gas gets trapped within the gluten network, causing the dough to rise and giving the bread its airy, soft crumb.
Moreover, proofing isn’t just about leavening; it’s also key to enhancing the flavor of your bread. Longer proofing times, particularly for artisan bread, allow the natural sugars and acids in the dough to develop, resulting in the complex, tangy, and slightly sweet taste that sets artisan bread apart from mass-produced loaves.
Without proper proofing, the bread may turn out dense, flat, or flavorless. Whether you’re aiming for a light ciabatta or a crusty pane di Altamura, taking the time to proof your dough correctly is critical to achieving that perfect loaf.
Artisan Italian Bread Tips for Proofing in Any Climate
Proofing conditions can vary greatly depending on your environment, but with a few adjustments, you can ensure success in any climate:
1. Cold Climates:
In colder temperatures, yeast activity slows down, and proofing can take much longer. To maintain an ideal proofing environment:
- Use your oven as a makeshift proofing box by turning on the oven light (but not the heat).
- Place the dough near a warm spot, like on top of the fridge or next to a warm appliance.
- Try a bowl of warm water inside a microwave or oven to create a humid, warm space for proofing.
2. Hot Climates:
In warm or humid weather, dough can overproof quickly, leading to collapsed loaves or overly sour flavors. To prevent this:
- Use cooler water when mixing the dough to slow down fermentation.
- Shorten proofing times and check the dough frequently to avoid overproofing.
- Consider refrigerating the dough during bulk fermentation to control the rise.
3. Managing Humidity:
Humidity affects how dough hydrates and rises. If it’s too dry, the dough can develop a crust during proofing, while high humidity can make the dough sticky. Cover the dough with plastic wrap, a damp towel, or a proofing lid to maintain optimal moisture levels.
Common Proofing Mistakes to Avoid
1. Overproofing:
Overproofing happens when the dough ferments for too long, causing the gluten structure to weaken and the dough to deflate. Signs of overproofed dough include an overly sour smell, a sticky surface, or a loaf that collapses during baking. To avoid this, monitor your dough and perform the “poke test” gently press a finger into the dough; if it springs back slowly, it’s ready.
2. Underproofing:
Underproofed dough hasn’t had enough time to develop, leading to a dense texture and weak rise. Signs include a tight crumb or a loaf that splits unpredictably during baking. If your dough hasn’t doubled in size or feels firm when poked, it likely needs more time to proof.
3. Ignoring Environmental Factors:
Failing to adjust proofing times for your climate can lead to inconsistent results. Always take note of your kitchen’s temperature and humidity, and adjust proofing times as needed.
4. Rushing the Process:
Artisan bread is all about patience. Cutting proofing times short to save time can compromise the bread’s flavor and texture. Embrace the slow fermentation process it’s worth the wait for a flavorful and airy loaf.
By understanding the critical role of proofing, adapting to your environment, and avoiding common pitfalls, you’ll set yourself up for success in creating artisan Italian bread with the perfect rise, flavor, and texture.
Baking Hacks for the Perfect Loaf
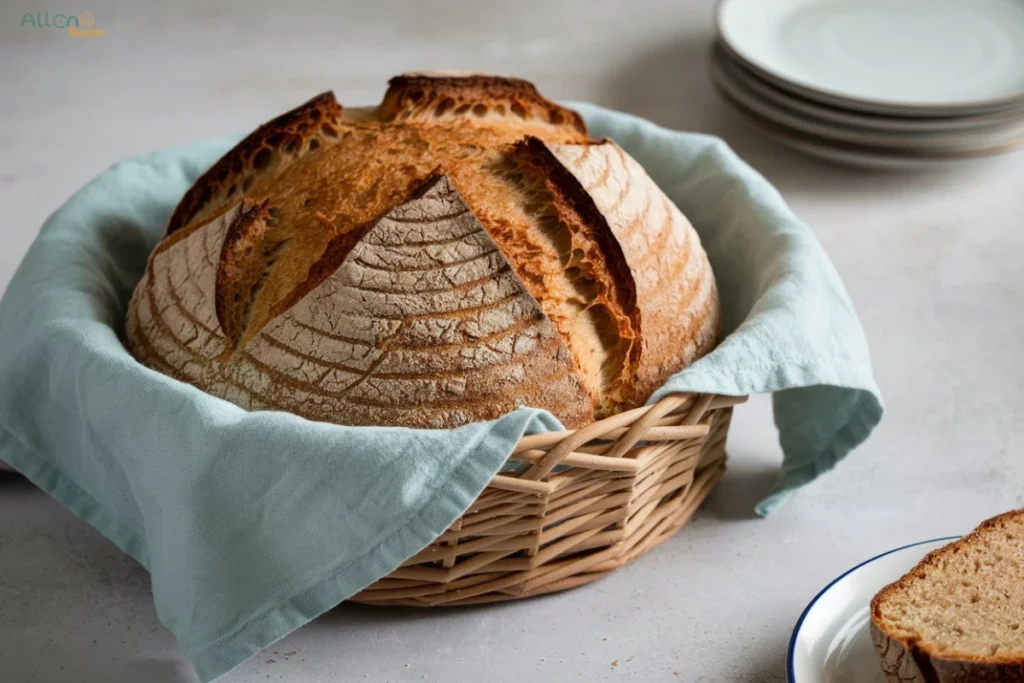
Scoring Techniques for an Artisan Finish
Scoring is an essential step in baking artisan Italian bread, as it serves both functional and aesthetic purposes. Proper scoring allows the dough to expand during baking by directing how and where the steam escapes. Without scoring, the bread may burst unpredictably, resulting in a misshapen loaf.
To achieve a professional artisan finish, use a bread lame (a razor-sharp blade) or a very sharp knife. The key is to cut quickly and confidently at a slight angle, about ¼ inch deep. Avoid dragging or hesitating, as this can tear the dough.
Here are a few popular scoring patterns to elevate your bread’s appearance:
- Straight Slash: A single, long slash down the center, ideal for baguettes or simple loaves.
- Crisscross or X Pattern: Perfect for round loaves like boule; it adds visual interest while helping the loaf expand evenly.
- Leaf or Wheat Designs: A more decorative option for experienced bakers, involving multiple curved cuts to mimic natural patterns.
For the best results, score the dough just before placing it in the oven. If your dough feels too sticky to score cleanly, dust it lightly with flour to prevent the blade from sticking.
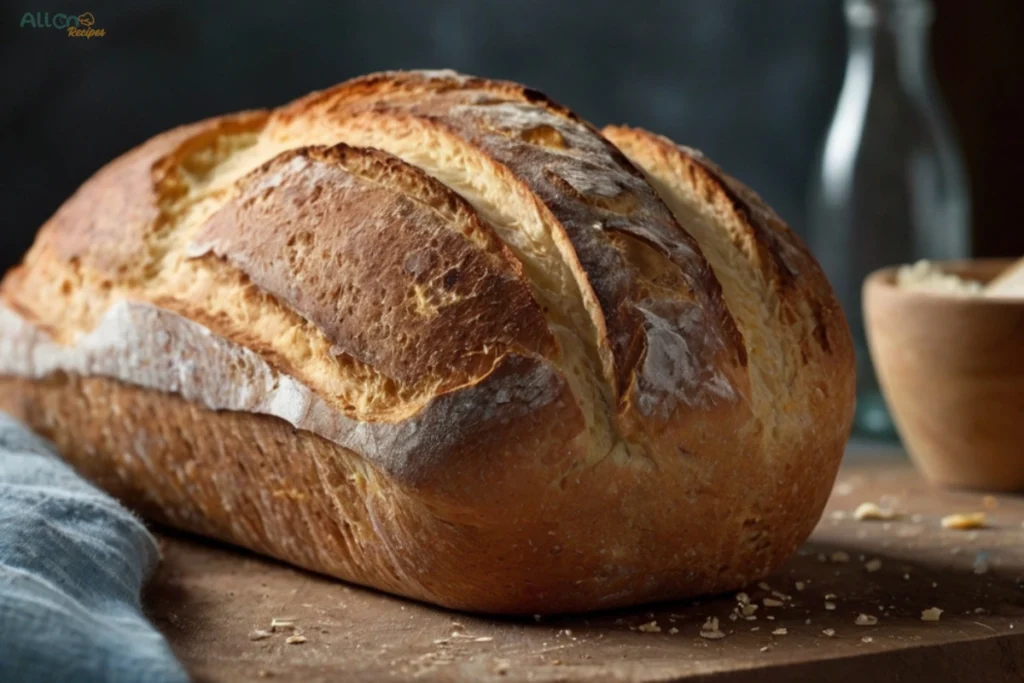
Steam for That Signature Crust
Creating steam in your oven is a game-changer when it comes to baking artisan Italian bread. Steam helps the dough expand during the first few minutes of baking (called “oven spring”) and prevents the crust from hardening too early. This results in a glossy, golden-brown crust that crackles as it cools—a hallmark of artisan bread.
Here are some simple methods to add steam to your oven:
- Using a Dutch Oven: A Dutch oven traps the dough’s natural moisture, creating a steamy environment without any extra effort. Just preheat the pot and bake with the lid on for the first 20–30 minutes, then remove the lid to brown the crust.
- Tray of Water: Place a metal baking tray or pan on the bottom rack of your oven. Add a cup of hot water right after placing the bread inside to generate steam.
- Ice Cubes: Toss a few ice cubes onto the bottom of the oven or a preheated tray to release steam gradually as they melt.
For safety, avoid using glass trays for steaming, as they can crack in high heat. Steam is most effective during the first 10–15 minutes of baking, so ensure your oven is hot and ready before introducing your dough.
Temperature Tips for Even Baking
Getting the right temperature is crucial for baking artisan bread that is evenly cooked inside and out. Most artisan Italian bread recipes call for a high baking temperature, typically between 450°F (230°C) and 500°F (260°C). This high heat helps create a robust oven spring, caramelizes the crust, and locks in moisture for a tender crumb.
Here’s how to ensure even baking:
- Preheat Your Oven Thoroughly: Give your oven plenty of time to heat up, ideally 30–40 minutes, especially if you’re using a baking stone or steel. These tools retain and distribute heat evenly, ensuring consistent results.
- Use a Thermometer: Ovens can vary in accuracy. Place an oven thermometer inside to confirm the correct temperature and adjust as needed.
- Check for Doneness: Use a kitchen thermometer to check the bread’s internal temperature it should read between 190°F (88°C) and 210°F (99°C). Bread that’s underbaked will feel gummy, while overbaked bread may have an overly dry crumb.
- Positioning Matters: Bake your bread on the center rack for even airflow and heat distribution. If your oven has hot spots, consider rotating the loaf halfway through baking.
By mastering these techniques, from scoring to managing steam and temperature, you’ll create artisan Italian bread with a bakery-quality finish crispy on the outside, tender on the inside, and full of rich, complex flavors.
Elevating Your Artisan Italian Bread Game
Experimenting with Flavors and Add-Ins
Artisan Italian bread is already delicious in its classic form, but adding unique flavors and ingredients can elevate it to something truly special. Whether you want a savory twist or a hint of sweetness, experimenting with add-ins allows you to personalize your loaf while honoring the spirit of Italian bread.
1. Herbs and Spices:
Incorporating fresh or dried herbs like rosemary, thyme, or basil can infuse your bread with aromatic, earthy flavors. For a bolder taste, try adding garlic powder, crushed red pepper flakes, or fennel seeds. These additions pair beautifully with olive oil or hearty Italian dishes.
2. Cheese:
Cheese is a fantastic add-in that brings richness and depth to artisan bread. Shredded Parmesan, Pecorino Romano, or Asiago work particularly well. For a gooey surprise, consider folding in chunks of mozzarella or provolone.
3. Olives and Sun-Dried Tomatoes:
Chopped kalamata olives or oil-packed sun-dried tomatoes add bursts of savory flavor and a Mediterranean touch. These ingredients work beautifully in rustic loaves like focaccia or ciabatta.
4. Sweet Additions:
If you prefer a sweeter bread, consider adding dried fruits like figs, raisins, or cranberries. Pair them with a handful of chopped nuts, such as walnuts or almonds, for added texture and flavor.
5. Specialty Flours and Seeds:
Experimenting with different flours, such as spelt or semolina, can alter the flavor and texture of your bread. Topping your loaf with sesame seeds, poppy seeds, or flaxseeds adds crunch and visual appeal.
Artisan Italian Bread & Regional Variations to Try
Italian bread has diverse regional variations, each reflecting local ingredients and traditions. Trying these unique styles will deepen your appreciation for the artistry of Italian baking.
1. Ciabatta:
This airy, rustic bread from Northern Italy is known for its open crumb and chewy texture. It’s made with high-hydration dough and often used for sandwiches or dipping in olive oil.
2. Pane di Altamura:
Hailing from the Puglia region, this bread is made with durum wheat semolina, giving it a golden hue and a dense, flavorful crumb. It’s perfect for soups, stews, or simply with olive oil and balsamic vinegar.
3. Focaccia:
A Ligurian specialty, focaccia is a flatbread generously topped with olive oil, sea salt, and sometimes herbs or vegetables like cherry tomatoes, onions, or olives. It’s a versatile bread that can be served as an appetizer or side dish.
4. Pane Toscano:
This traditional Tuscan bread is notable for being salt-free, allowing it to complement the region’s bold flavors, like cured meats and rich sauces. Its simple taste makes it a blank canvas for pairing.
5. Grissini:
Thin, crunchy breadsticks originating from Piedmont, grissini are seasoned with salt, herbs, or seeds. They make an excellent snack or accompaniment to antipasto platters.
Serving and Storing Your Bread
Once your artisan Italian bread is baked to perfection, it’s time to enjoy and preserve it. Proper serving and storage techniques ensure the bread remains fresh and delicious.
1. Serving Suggestions:
- Serve warm or at room temperature for the best flavor and texture. Reheat briefly in the oven to refresh the crust.
- Pair with olive oil and balsamic vinegar for dipping, or serve alongside a charcuterie board with cured meats, cheeses, and marinated vegetables.
- Use slices for sandwiches, paninis, or bruschetta topped with tomatoes, basil, and mozzarella.
2. Storing Your Bread:
- Short-Term Storage: Wrap the bread loosely in a paper bag or clean kitchen towel to maintain the crust’s crispness for up to 2 days. Avoid plastic bags, which can make the crust soggy.
- Long-Term Storage: Freeze leftover bread by wrapping it tightly in plastic wrap or aluminum foil and placing it in an airtight freezer bag. Thaw at room temperature and reheat in the oven for a fresh-baked taste.
3. Avoiding Waste:
If your bread begins to stale, don’t throw it away! Turn it into breadcrumbs, croutons, or Panzanella (a traditional Italian bread salad). These options let you enjoy every last bit of your homemade loaf.
By experimenting with flavors, exploring regional variations, and properly serving and storing your bread, you’ll unlock the full potential of artisan Italian bread-making. Each loaf becomes a celebration of Italian tradition, creativity, and care.
Conclusion
Baking artisan Italian bread at home is more than just a culinary endeavor it’s a rewarding experience that fills your kitchen with the warmth of tradition and the irresistible aroma of freshly baked bread. By following these 10 hacks, from choosing the right flour to mastering the proofing process and perfecting your baking techniques, you’ll be well on your way to creating loaves that rival those of your favorite bakeries.
Don’t be afraid to experiment with flavors, add-ins, and regional variations to make each loaf uniquely yours. The beauty of artisan bread lies in its versatility and the personal touch you bring to every bake.
Now it’s your turn! Try out these hacks and let us know how they work for you. Have a favorite tip or technique of your own? Share your results, ideas, or questions in the comments below we’d love to hear from you. Happy baking!
Leave a Reply