Okay, so here’s the thing: thick steaks, especially a Delmonico, don’t always behave when you try to blast them in a hot pan. They’ll look great outside, but then you cut in, and it’s raw in the middle or worse, dry around the edges with just a sliver of pink in the center.
Reverse searing solves that.
You start low. You go slow. And then right at the end, you hit it with heat.
You Need a Few Basics
Nothing fancy, just:
- A thick steak (Delmonico, ribeye, whatever, at least 1.5 inches)
- An oven or grill that can hold 250°F
- A hot surface for finishing (cast iron, grill, something that gets ripping hot)
- A thermometer, not optional. This method depends on temps, not time.
First: Let the Steak Chill (But Not Cold)
I usually take mine out of the fridge and let it sit on the counter for a bit. Not too long, but enough that it’s not freezing in the middle. Then I salt it. Pepper too. That’s it. Sometimes I do this part hours before and leave it in the fridge uncovered to dry out the surface, helps with crust later.
Step One: Slow Roast
I throw it in the oven at 250°F. Sometimes I use the grill with indirect heat. Doesn’t matter much as long as the air’s hot and not hitting the meat directly.
I put the steak on a wire rack over a tray so air can get underneath. No flipping. Just let it ride.
I’m watching for internal temp, not time. Usually:
- 115°F if I want rare
- 120°F for medium-rare
- 125°F for medium
Takes anywhere from 30 to 45 minutes, depending on how thick and how cold it started.
Step Two: Pause
Once it hits the target, I pull it and let it rest. Yeah, before searing. That’s the trick. Give it 8–10 minutes. It’s not going to cool too much. What it does is even out, and the surface dries a bit, which is what you want for the next part.
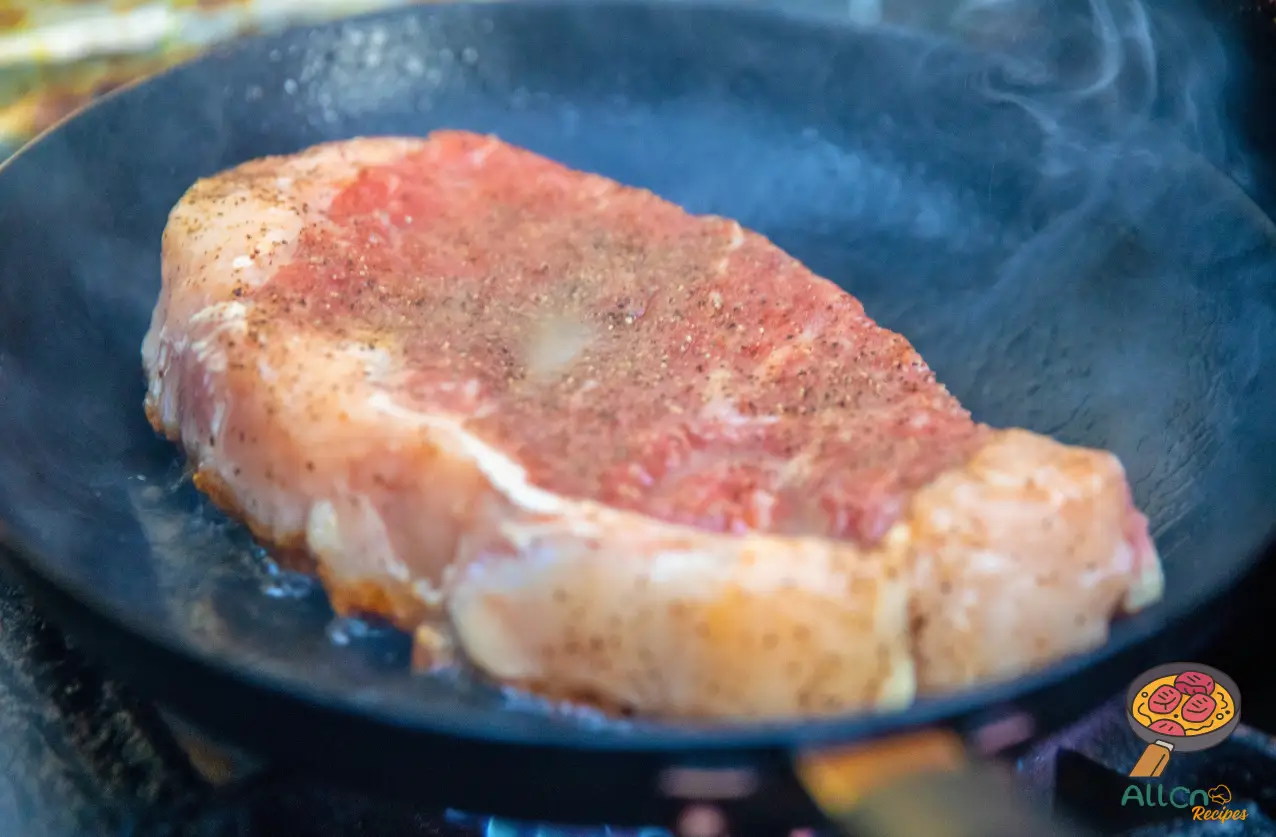
Step Three: Sear It Hot
Now I crank up a cast iron pan. Dry first, then a touch of oil. Or I use the grill with the lid open, heat on full blast.
Steak goes on for a minute or so per side. That’s it. I’m not cooking it anymore, just giving it that final crust. I don’t even flip more than once unless I’m getting fancy with angles.
Sometimes I drop in a pat of butter and a crushed garlic clove right at the end and spoon it over. Sometimes I don’t. It depends on the mood.
Done
Let it sit again, just a few minutes. Then I slice it against the grain and serve.
It’s even all the way through. No overcooked edges. The crust is solid. The center’s perfect. It’s hard to mess up if you follow the temps.
Why I Bother
It takes longer, sure. But it’s calm. No smoke alarms, no pan-flipping stress. And with a thick Delmonico, it’s the only way I can get it perfect edge-to-edge without guessing.
Once you try it, the old way feels rushed. This one just works better.

I grew up in a house where red meat was practically a love language. Sundays meant steaks on the grill, buttery potatoes on the side, and someone yelling, “Who wants the corner cut?” It was delicious… but not exactly light.
Years later, I found myself craving those meals, but also trying to eat a little cleaner, less heavy, less guilt, fewer naps after dinner. I tried swapping things out, but the flavor just didn’t hit the same. I didn’t want less, I wanted better.
That’s when I got curious. What if I could cook steakhouse-style meals with a few smart changes, still rich, still indulgent, but just a little more balanced?
Spoiler: you totally can. And that’s what this blog is all about.
Here on All On Recipes, you’ll find my take on the classic Delmonico steak, plus side dishes, marinades, and healthier spins that won’t make you miss the original. I use real ingredients, skip the fuss, and aim for flavor that punches way above its prep time.
This isn’t a salad blog (though I love a good salad with my steak). It’s a space for anyone who loves bold food, simple cooking, and maybe sneaks a little extra garlic in every recipe.
So whether you’re a seasoned home cook or want to finally get that perfect crust on a steak, I’ve got you.
Now, grab a pan. Let’s make something that smells amazing.
– Ree
- Meatloaf Internal Temperature Guide (Done Right) – February 15, 2026
- How to Sear a Steak – December 18, 2025
- Chuck Delmonico Steak: What It Is and Why Chefs Love It – September 13, 2025
Leave a Reply