
This whole thing started because I couldn’t get one meal out of my head: a Delmonico steak I had years ago at a tiny, no-name spot. It was buttery, tender, ridiculously good. And I remember thinking, “Why can’t I make this at home?”
So, I tried. And failed. And tried again. Eventually, I figured out how to recreate that magic, not just for myself, but for my friends (who now ask if I do catering, I don’t, by the way).
That’s when I realized: it doesn’t take a culinary degree to make incredible meals. It just takes a little curiosity, a few smart swaps, and a deep love for garlic.
On my blog, you’ll find:
🥩 Simple, steak-forward recipes
🌿 Healthier takes that don’t taste “healthy”
🍷 Sides and sauces that make any dinner feel special
🔥 Tips to master the perfect sear (no fancy pan required)
If you love real food, bold flavor, and meals that feel like a treat without the food coma, you’re going to feel right at home here.
Pull up a chair. Let’s cook something amazing.
Eliza _ Creator of AllOnRecipes.com
- How Long to Cook Meatloaf at 350°F (Perfect Every Time) – January 29, 2026
- Meatloaf Cooking Time Chart (350°F) – January 29, 2026
- best meatloaf ever will knock your socks off – January 4, 2026
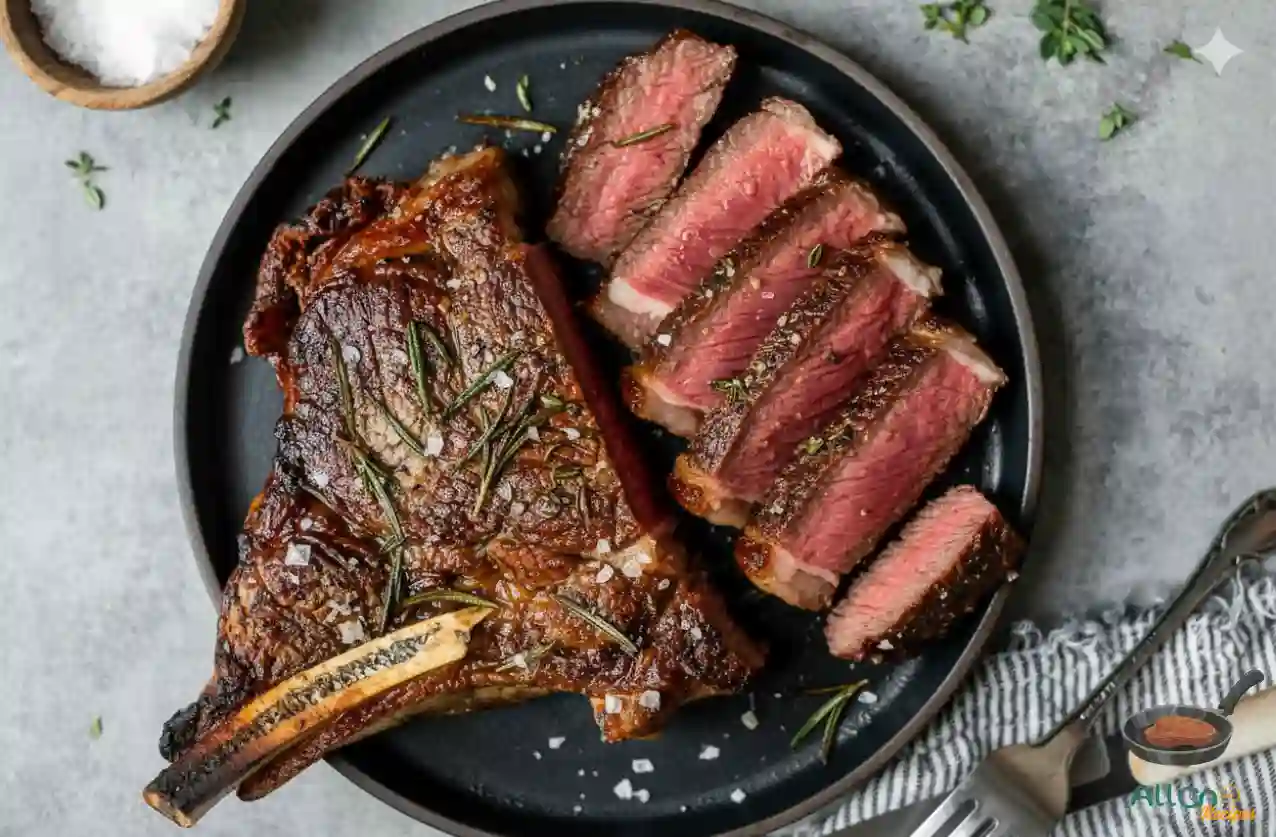
Let’s be honest , few things in life rival the satisfaction of cutting into a perfectly seared, medium-rare steak. That juicy blush in the center, the golden crust that crackles just enough under your knife, and the aroma that fills your kitchen , it’s the kind of small victory that makes any night feel like a steakhouse celebration.
The good news? You don’t need a $60 ribeye from a restaurant or a professional grill to get there. All you need is a solid cast iron skillet, a good piece of beef, and a bit of timing know-how. This guide walks you through the simple, reliable method I use to get that steakhouse flavor at home , indulgent yet practical, rich but never heavy.
By the end, you’ll understand exactly why cast iron delivers that unbeatable crust, how to time your sear for true medium-rare, and how to avoid the common mistakes that can turn a beautiful cut into a chewy regret.
Why Cast Iron Is Your Best Friend for Steak
If there’s one kitchen tool I’d rescue in a fire , well, after the coffee maker , it’s my cast iron skillet. Heavy, stubborn, and built like it’s been through a few lifetimes, this pan is the secret behind every steak that’s ever made someone at my table stop mid-sentence.
Cast iron just holds heat differently. It doesn’t shout; it hums , steady, consistent, ready. Once it’s hot, it stays hot, which means when your steak hits that surface, you get that dramatic sear that locks in all the flavor. A stainless pan can do some of that, but cast iron? It’s like cooking with a memory , it remembers every steak, every bit of seasoning, every tiny layer of fat that’s built up over time.
And here’s the thing: it’s forgiving. Even if you’re not a pro, even if you’re juggling sides or pouring wine at the same time (we’ve all been there), it keeps the temperature steady enough to give you that crust every time. Just… don’t rush it. A cold pan is the fastest route to disappointment , and to be fair, we’ve all been there once, too.
If you’re wondering whether all this weight and seasoning maintenance is worth it, it is. It’s not just nostalgia , it’s science. The dense iron stores heat so evenly that when your steak lands, the surface browns instantly instead of steaming. That’s the difference between “good” and “oh wow.”
So before we move on , preheat that pan like you mean it. It’s the single most important step you’ll take in this whole process.
Preparing Your Steak + Pan , the Foundations
Here’s where good intentions meet real results. You can’t get a perfect medium-rare steak without setting the stage properly , and yes, the little things matter more than you think.
Choose the Right Cut
You want marbling , those little white rivers of fat running through the meat. That’s where the flavor hides. Ribeye and New York strip are my go-tos, but if you’ve only got sirloin or filet, that’s fine too. Just avoid paper-thin cuts. Anything under an inch thick cooks too fast and leaves you playing temperature roulette.
Quick confession: I used to grab whatever looked prettiest in the butcher case. Then I learned that thickness beats beauty every time. Aim for around 1 to 1½ inches , it gives you enough time to build a crust without overcooking the center.
And please, let your steak breathe. Take it out of the fridge about 30 minutes before cooking. Cold steak + hot pan = uneven cooking, no matter how fancy your skillet is.
Seasoning & Oil , Keep It Simple
There’s an entire internet argument about when to salt a steak. I’ve tried both , hours ahead and right before cooking. Honestly? If you’re cooking within the hour, salt it right before it hits the pan. Salt draws out moisture, and you want that crust, not a wet surface.
Pat the steak completely dry with paper towels , this step looks boring but changes everything. Then season with plenty of kosher salt (don’t be shy) and a touch of pepper if you like a little bite.
As for oil, skip olive oil for this part , its smoke point is too low. Go with something high-heat and neutral: avocado, grapeseed, or even refined canola if that’s what’s in your pantry. Lightly coat the skillet, not the steak.
Preheat Like You Mean It
Here’s where patience pays off. Heat your cast iron over medium-high until it’s genuinely hot. Not “I think it’s ready” hot , more like “I can feel the heat from a few inches away” hot. The oil should shimmer, almost ripple across the surface. That’s your signal.
If you toss the steak in too early, it’ll steam instead of sear , and you’ll lose that satisfying crust before you even start. Trust me, it’s worth waiting the extra minute.
The Cook: Searing to Medium Rare
Alright, apron on. This is the moment where science and instinct meet. The steak is ready, the skillet is hot, and you’ve got about six minutes to nail this.
Step 1: The Sear
Take a deep breath (and maybe step back just a bit). Lay the steak in the pan away from you so the oil doesn’t pop back in protest. The sound should be sharp and immediate , like applause. If it’s quiet, your pan isn’t ready.
Now, don’t move it. Seriously , hands off. For the first 3 to 4 minutes, let the heat do its work. This is where the crust forms, that deep golden layer that locks in flavor. If you peek too soon, you’ll tear it. Be patient; you’ll know it’s ready to flip when it releases easily.
Flip the steak once. You’ll see that dark, beautiful crust , it should look like something out of a restaurant kitchen. Cook the second side for another 3 minutes for a true medium rare.
Step 2: Flavor Finish
During the last minute, drop in a tablespoon of butter, a crushed garlic clove, and maybe a sprig of thyme or rosemary. Tilt the pan slightly and spoon that melted butter over the steak. It’s not just for flavor , it adds that glossy finish that makes the meat feel richer than it has any right to be.
There’s a quiet joy in this part. The aroma changes , nutty butter, sizzling garlic, a hint of char. This is the moment people start wandering into your kitchen, pretending they just happened to be nearby.
Step 3: Check Doneness
Forget guessing by touch if you’re new to this. Grab an instant-read thermometer and slide it into the side of the steak, not the top. You’re aiming for 130 °F to 135 °F (54 °C to 57 °C) for medium rare. The temp will rise a few degrees as it rests, so pull it just before it hits target.
If you don’t have a thermometer, it’s okay , you’ll develop a feel over time. The steak should spring back gently when pressed, not squish flat.
Step 4: Rest
This part’s non-negotiable. Transfer the steak to a cutting board and let it rest for about 5 minutes. You can cover it loosely with foil if your kitchen’s drafty. The juices will redistribute, which means they’ll stay in the meat instead of pooling on your board.
Skipping this step is the culinary equivalent of leaving a movie before the ending , you miss the part that ties everything together.
Serving & Slicing Like a Pro
This is where it all pays off , the quiet pause before the first slice, the little thrill that says, yep, I actually did this right.
Slice Against the Grain (Always)
Grab your sharpest knife. Not the dull one you use for everything , the good one. Place the steak on a cutting board and look closely: you’ll see the muscle fibers running in one direction. You want to cut across those lines, not along them. Against the grain.
Why? Because that’s what makes each bite tender instead of chewy. You don’t have to overthink it , just turn the steak until you see those faint lines, then slice thinly, about a quarter-inch per piece.
And honestly, if you lose patience halfway through and sneak a bite straight from the board , that’s practically tradition.
Add the Finishing Touches
If you basted with butter and herbs, drizzle that liquid gold right over the top. It’s packed with garlicky, herby depth , no need for fancy sauces. But if you want to elevate things, a dollop of compound butter (soft butter mixed with herbs or blue cheese) makes it taste like a steakhouse splurge.
Pair it with something that plays well with that richness , roasted asparagus, garlic mash, or even a crisp salad if you’re feeling balanced. Remember, this isn’t about guilt; it’s about satisfaction that feels earned.
Quick Note on Presentation
Let’s be real , plating doesn’t have to look like a magazine spread. A warm plate, a little contrast in color, and maybe a sprinkle of flaky salt are all you need. Half the magic of cooking at home is that you get to skip the pretense and go straight to the flavor.
Troubleshooting & Common Mistakes
Every cook has that one steak story , the one that looked perfect in the pan and came out grey, or the one that hit the cutting board bleeding like a crime scene. I’ve done both. Here’s how to sidestep those classic traps so you don’t have to learn the hard way.
Mistake 1: Starting with a Cold Steak
If your steak goes from fridge to skillet in one move, the inside will lag behind the crust. You’ll end up with a charred outside and a chilly middle. Let it sit out for 30 minutes before cooking; it’s enough to even things out without inviting food-safety drama.
Mistake 2: A Pan That’s Not Hot Enough
A cast-iron skillet rewards patience. If you rush the preheat, you’ll get a sad, grey surface instead of that deep sear. The oil should shimmer , not smoke wildly, but shimmer like summer pavement. If you’re unsure, wait another 30 seconds.
Mistake 3: Overcrowding the Pan
Two steaks in one skillet? Sure , if it’s a big skillet. Otherwise, you’re steaming, not searing. Cook one at a time if you must. You’ll thank yourself later when each one gets its own crusty halo.
Mistake 4: Overcooking Out of Fear
We’ve all done the “just one more minute” thing. Resist it. Remember, the steak keeps cooking after it leaves the heat. Pull it at 130 °F (54 °C) for medium rare, then let it rest. It’ll coast right into perfection on its own.
Mistake 5: Skipping the Rest
It’s tempting , you’ve got that gorgeous, sizzling steak right in front of you. But slice too soon and you’ll watch all that flavor bleed out onto the board. Five minutes under a loose tent of foil makes all the difference. Think of it as the steak catching its breath.
Bonus Tip: No Crust? You Probably Didn’t Dry It Enough
Pat the steak dry like you mean it. Water turns into steam, and steam ruins sear. A paper-towel moment up front saves disappointment later.
Leave a Reply