
Key takeaways
- Thick steaks need the reverse sear: slow oven first, hot skillet second
- Trust your thermometer, not the clock
- Pull the steak 10 degrees below your target temperature
- Rest it twice: once before the sear, once after
- Total time is about 45 minutes, and it serves two
How to Cook a 2-Inch Steak in Cast Iron (Without Ruining It)
You can smell it before you start: the hiss of hot iron, the promise of a crust that makes everyone stop mid-sentence. But when the steak is a full two inches thick, timing becomes the whole story. A minute too long and it’s dry. A minute too short and you’re cutting into raw ambition.
If you’ve ever overcooked a ribeye, it probably wasn’t because you didn’t care. Thick steaks simply behave differently from thin ones. The fix is a method called the reverse sear, and it’s what I’d use on any cut that deserves respect, whether that’s ribeye, filet, or something in between.
Why the Reverse Sear Works
The usual approach is to sear first and finish in the oven. With a thin steak, that’s fine. With a thick one, the outside gets blasted long before the center catches up, and you end up with a gray band around a cool middle.
The reverse sear flips the order. You warm the steak gently in a low oven so it cooks evenly from edge to edge. Then you sear it hard in a smoking skillet for the crust. “Reverse sear” just means searing last instead of first.
It’s patient and deliberate, and honestly, it’s the most forgiving way to cook an expensive cut.
What You’ll Need
- 1 steak, 2 inches thick (ribeye or filet mignon)
- Kosher salt and coarse black pepper
- 1 tablespoon high smoke-point oil (grapeseed, avocado, or canola)
- 2 tablespoons unsalted butter
- 2 to 3 garlic cloves, lightly crushed
- A few sprigs of thyme or rosemary
- Flaky salt, if you like
- A cast-iron skillet and an instant-read thermometer
Timing: 10 minutes of prep, 25 to 35 minutes of cooking, and 10 minutes of resting. About 45 minutes total.
Step 1: Heat the Oven and Dry the Steak
Set your oven to 250°F (120°C). Put a wire rack over a baking sheet and set the steak on top. That slow heat dries the surface slightly, and a dry surface is what gives you a crisp crust later.
Pat the steak dry until it feels almost tacky.
Step 2: Season Generously
Salt and pepper both sides, and don’t be shy. This layer becomes your crust.
Step 3: Slow Roast to the Right Temperature
Slide the rack into the oven and cook until the internal temperature hits your pull temperature:
- 115°F for rare
- 125°F for medium-rare
- 135°F for medium
This usually takes 20 to 30 minutes, but trust the thermometer, not the clock. Push it into the thickest part of the steak. The reward is a color that stays even edge to edge, with no gray banding and no guesswork.
Step 4: Rest Before the Sear
Take the steak out and let it sit for 5 to 10 minutes while the pan heats. This pause lets the muscle fibers relax so the juices stay inside where they belong.
Step 5: Sear in Cast Iron
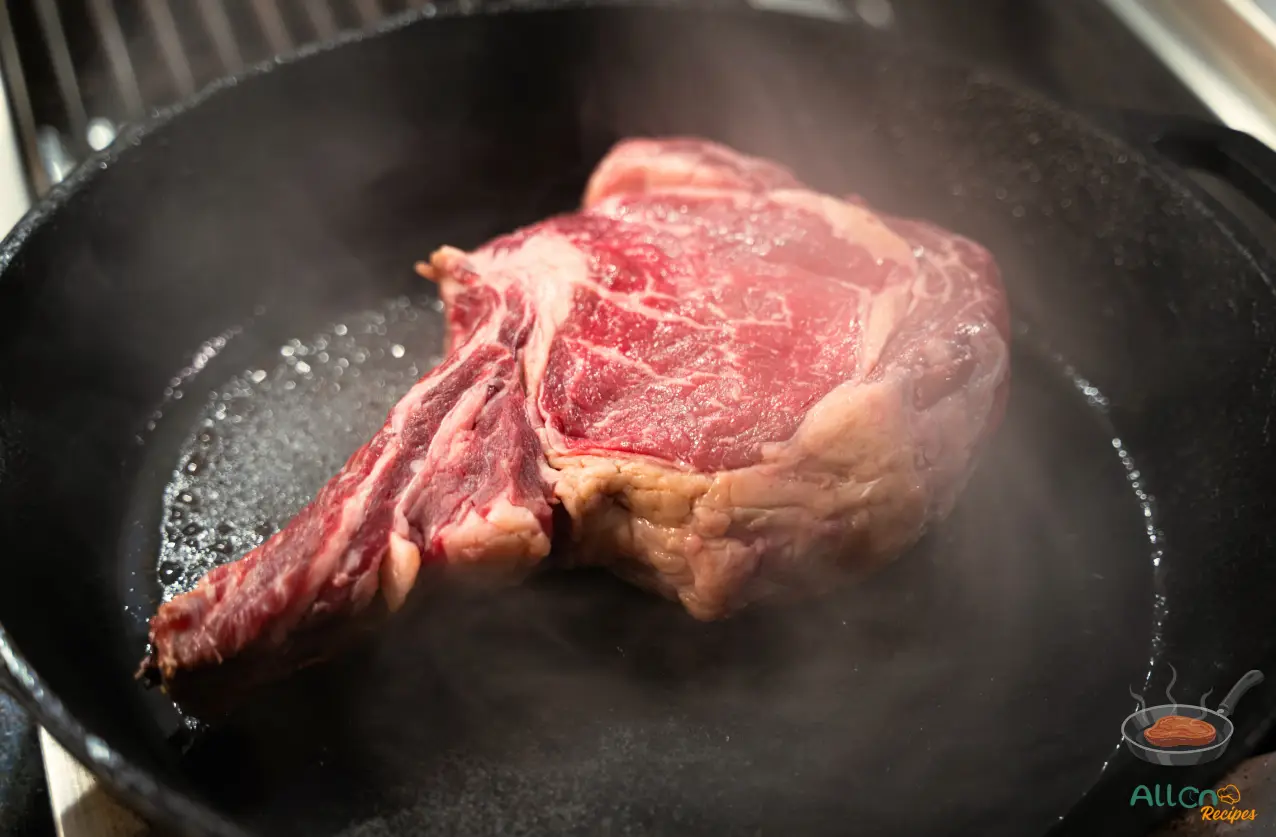
Heat your skillet over high heat until it just starts to smoke. Add the oil, then the steak. Sear for 45 to 60 seconds per side, until dark golden brown.
Now drop in the butter, garlic, and herbs. Tilt the pan and spoon the bubbling butter over the steak for another 30 seconds per side. You’ll know it’s working by the smell: nutty butter, toasted garlic, and that unmistakable steakhouse aroma.
Step 6: Rest Again and Slice
Move the steak to a board and rest it for five more minutes. Then slice against the grain, pour the pan butter over the top, and finish with flaky salt. The center should blush pink, and the crust should whisper as your knife moves through it.
Doneness and Timing Chart
| Doneness | Pull Temp | Final Temp | Oven Time + Sear | What It Looks Like |
|---|---|---|---|---|
| Rare | 115°F | 120–125°F | 20 min + 1 min per side | Cool red center, soft |
| Medium-Rare | 125°F | 130–135°F | 25 min + 1 min per side | Warm red-pink, juicy |
| Medium | 135°F | 140–145°F | 30 min + 1.5 min per side | Light pink, firm but tender |
| Medium-Well | 145°F | 150–155°F | 32 min + 2 min per side | Slight pink, denser |
| Well-Done | 155°F | 160°F+ | 35 min + 2 min per side | Uniform brown, firm |
You’ll notice the pull temperature sits about 10 degrees below the final one. That’s carry-over heat: the steak keeps cooking from residual warmth after it leaves the heat, so you pull early and let it finish.
A note on cuts: Ribeye’s marbling can handle an extra 30 seconds per side in the pan, which helps the fat render fully. Filet is lean and gentle, so pull it five degrees below your goal and let carry-over heat do the rest.
Common Mistakes (and How to Fix Them)
Burned outside, raw inside. Your pan is too hot. Cast iron holds heat longer than you’d think, so ease off and let the oven do the heavy lifting.
The steak sticks. If it’s sticking, it isn’t ready to flip. Wait another 30 seconds, because the crust releases on its own once it forms.
Weak crust. Too much crowding and not enough heat. Cook one steak at a time or use a larger pan.
Overcooked edges, cool center. You skipped the oven. The stovetop alone can’t push heat evenly through a thick cut.
Cut too soon. Five minutes of rest keeps the moisture in the meat instead of on the board.
Wrong pan. Nonstick can’t take this heat. Stick with cast iron or carbon steel.
No thermometer. A few degrees changes the whole story. Guessing ruins great meat.
Serving and Leftovers
Once the steak has rested, slow down. Slice against the grain with steady, even strokes. Spoon the butter and juices from the pan over the slices, and add a dusting of flaky salt right before serving.
If you have leftovers, warm them gently in a low oven, never the microwave. And let your skillet cool on its own, since seasoning builds flavor over time.
Quick FAQ
How long should I let it rest? Five to ten minutes. That’s where tenderness happens.
Can I skip the oven? You can, but you’ll lose the even heat that makes this method so foolproof.
What’s the best oil for searing? Grapeseed, avocado, or refined canola. Save the butter for flavor at the end.
What if my steak is thinner? Cut the times roughly in half and keep your thermometer close.
Do I really need to baste? No, but once you smell butter hitting hot iron, you’ll never skip it again.
The Takeaway
Patience beats power. A thermometer is more honest than your instincts. And once you’ve done it once, you’ll stop dreading thick steaks and start looking for them.
Take a second to look at what you made: the crust, the color, the scent. That’s your timing, your patience, your touch.
Try it this weekend and tell me how it went. What cut did you use, and where did you land on doneness? Drop it in the comments.

You know how some people chase the perfect sourdough loaf or the fluffiest pancakes? For me, it’s all about steak doneness. That perfect moment when the center is blushing pink, the juices are sealed in, and the crust has that beautiful, smoky edge? That’s my happy place.
It started with frustration, honestly. I ruined a lot of good cuts back in the day, undercooked, overcooked, chewy disasters. One night, I served my date a “medium rare” Delmonico that was practically raw in the middle; she still brings it up.
So I dug in. Learned how temperature works. Got a thermometer. Learned to trust my fingers, my eyes, and the timing. I turned my kitchen into a bit of a steak lab, and yeah, I dragged a few friends along as taste testers.
Now, I help people hit that sweet spot, whether you like your steak rare, medium, or (hey, no judgment) well-done. I’ll show you how to cook it with confidence, flavor, and just the right balance of rich and healthy.
On this blog, you’ll find guides on doneness, smart tips on choosing cuts, my favorite spice blends, and ways to keep things flavorful without drowning everything in butter (though sometimes… it’s worth it).
I’m not here to gatekeep steak. I’m here to help you nail it, every time.
Let’s fire it up.
- 2 Inch Steak Cast Iron Cook Time Guide – October 6, 2026
- Pan Seared Steak Recipe: Perfect Crust, Precise Doneness – December 20, 2025
- Why Medium Rare Matters More Than You Think – November 17, 2025
Leave a Reply